Sunday, November 11, 2012

Spicy Udon Soup


Despite the summer-like weather, I made some spicy udon noodle soup this afternoon. A few days ago I saw this recipe on Foodgawker, and knew right away that I wanted to give it a try.   It is definitely a keeper, with endless variations. 

First, in a large sauce pan I sauteed garlic, ginger, and an onion in vegetable and sesame oils.


After a few minutes, I added in diced bell pepper and mushrooms.  This recipe is very versatile, so you could add really anything that you want here.  I bet bamboo shoots, green onion, and bok choy would all be awesome additions or substitutions. 


After a few more minutes, I added in vegetable broth (canned, this time) soy sauce, and lime juice.  Bring on the sodium!


Next I added some miso and chili garlic sauce.  Sriracha would work well too, but all of my sriracha is at work.  I let that boil for a few minutes and then dropped in an egg and scrambled it up in the broth with a fork. If you've never done this before, it is a great way to add a little protein to soup, and is great with ramen. Finally I added in the noodles. Udon noodles are an Asian variety of thick wheat noodles.  I was able to find some at my local Giant.  They either don't take long to cook, or come precooked.  I'm not sure.  I let the soup boil for just a few minutes, and then ladled myself a bowl.  Yum. 


Wednesday, November 7, 2012

Butternut Squash Pasta


At work we used to have a lunch club.  Every other week, someone would bring in a dish for the group to eat.  The cook rotated, so everyone got to enjoy new recipes and someone else's cooking.  My coworker Sarah Catherine brought in this butternut squash pasta. It was so good that I later asked her for the recipe so that I could make it myself. The recipe can be found here

The first step in making this pasta dish is to roast the butternut squash.  Cutting up the squash was probably the most difficult part of making this dish.  I lined a baking sheet with foil to minimize my clean-up and then tossed the cubed butternut squash with rosemary, salt, and pepper.  I baked the squash in the oven for about 45 minutes. 


While that cooked, I started on the sauce that would eventually pull the dish together.  First, I sauteed some scallions in olive oil while also preparing pasta according to the package. Hopefully I don't have to explain how to do that...


The next step is a little more complicated though.  Because I don't have a double boiler, I made my own contraption out of a frying pan on top of a sauce pan. The point of a double boiler is to avoid direct heat.  By putting water in the sauce pan, the frying pan receives indirect heat, reducing the risk of burning your sauce. I started off with a combination of salt and flour.


Then I added milk and stirred until the sauce started to thicken.  The flour helps with that process.  Next I added provolone cheese to the mixture. 


Once that was melted, I transferred my sauce to a sauce pan... 


...and stirred in the cooked pasta. At this point, the pasta was essentially macaroni and cheese.


Then I transferred everything to a oven-safe baking dish and topped the pasta with the butternut squash and scallions.  The final touch was to add some parmesan cheese.  You can never have enough cheese, right?


I baked the dish in the oven for about ten minutes, or until the parmesan cheese on top was melted.  Judging by this picture, I probably could have left it in the oven for a few more minutes.  But, alas, I was hungry and it smelled amazing.  I couldn't help myself, so I took it out and dug in. 


This dish is indulgent and delicious.  The recipe suggests adding bacon as well.  You can't go wrong with bacon, so I'm sure that is a great addition.  I'm so glad my coworker introduced me to butternut squash pasta!


Sunday, October 28, 2012

Pumpkin Chocolate Chip Cookies

This week I got pack into a pumpkin phase.  I made pumpkin oatmeal and pumpkin chocolate chip cookies.  Out of the two of those, the cookies were way better, so here I'll share the recipe I used.  I found it online; here's the link.  These cookies are cake-like, rather than ooey-gooey cookie-like, but are still quite tasty.

The first step in making these cookies (like almost any other cookies) was to combine the wet ingredients.  In this case, the wet ingredients were pumpkin, oil, egg, and sugar.  Next, combine the dry ingredients: flour, baking powder, baking soda, etc. Unlike traditional chocolate chip cookies, these also include fall spices: nutmeg and cinnamon.


Next, combine the wet and dry ingredients together, just until blended. 


After the ingredients are blended, you should have a cake-like batter, rather than a cookie-like batter.  Stir in the chocolate chips and vanilla.  I'm not sure why this recipe calls for the vanilla right at the end, rather than with the wet ingredients.  I would be that the recipe would turn out equally well adding the vanilla earlier.  I used mini chocolate chips in this batch of cookies.


Once the dough is complete, with chocolate chips, place cookie-size amounts onto a greased baking sheet.  If you want small cookies, use a smaller amount of dough than if you want larger cookies.


Then, bake in an oven preheated to 350 degrees for about 12 minutes.


I brought these cookies to work and to a Halloween party.  All around, they had very good reviews.  Unfortunately (for him), my boyfriend prefers traditional chocolate chip cookies to pumpkin chocolate chip cookies.  I'll have to make a batch of those soon! Has anyone tried out the New York Times recipe that is rumored to be fabulous?

Sunday, October 21, 2012

Vegetarian Pot Pie


I kicked off my fall recipes with pumpkin baking.  Now that it's starting to actually  get colder, here's a hearty pot pie recipe.  It's from the Skinny Bitch cookbook, pictured below.  The main ingredients are also pictured below: pie crust, flour, milk (non-dairy if you want a vegan recipe), oil, butter (margarine if you want a vegan recipe) and vegetables.  Here I used onion, carrots, peas, and broccoli, but any vegetables would do.  


There are three parts of this pot pie: vegetables, crust, and base. The first step in making this vegetarian pot pie is to cook the vegetables.  I started by sauteing the onion and carrots. 


Next, I added in the broccoli and frozen peas. 


Next up is the broth, or base for the pot pie. This is the unhealthy part.  First, I melted a stick up butter.


Then, I stirred in some flour to thicken it up. 


The third ingredient in this base was milk.  I stirred it into the butter and flour mixture. 


Once the vegetables and base were ready I mixed them together.  This will be the filling in the pot pie. 


This recipe was designed to make one standard pie-sized pot pie. Instead, I made two smaller pies.  They were meant to be individual servings, but really each pie had 2-3 servings in it. 


After the filling was in its dishes, I covered them with pie crust, pinching at the edges in an attempt to make it pretty. 


Then I baked it in the oven until the crust was golden brown. 


And voila, that is how you make pot pie.  Despite being vegetarian (and vegan with a few modifications), this pot pie tasted just how I remembered it. With a buttery, flaky crust, this dish is best served fresh out of the oven.


Thursday, October 11, 2012

Apple Chips


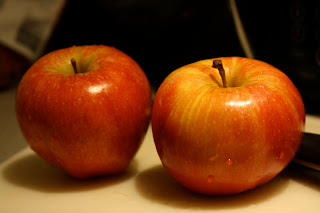
Just in case you're tired of pumpkin baked goods already, here's another fall recipe for you: apple chips.  These chips are 100% natural, unlike what you can find in a bag.  Plus, they're made from apples which are, of course, healthy.


The first step in making apple chips is to slice apples as thinly as possible.  To do so, I used a large sharp knife.  A mandolin would also work.  I found that one apple makes about one serving of chips. 


The seasoning for the apple chips is simple, and can be adapted to your taste.  I mixed together some cinnamon, sugar, and nutmeg for mine. 


Since these chips will be baked, they need to be put onto a cookie tray.  I found that one tray holds about one apple worth of slices.  I have smaller than average trays though, since I have a smaller than average oven. Covering the tray with foil, as shown here, did not prevent the apples from sticking.  Spraying the tray with non-stick spray did a much better job.  After laying out the apples in a single layer, I sprinkled on the cinnamon sugar seasoning. 


Then I baked the apples in a cool (225 degrees) oven for about two hours, flipping the chips over about half way through. 


When the apples come out they should be nice and crispy, just like potato chips.  If the apples aren't quite done they will have a texture more like fruit leather than chips....which isn't all bad either. I gobbled up these chips as soon as I made them.  Even my dad (not a fan of healthy food) liked them!


Tuesday, October 2, 2012

Vegan sweet potato and chickpea tacos

Who ever thought of making a taco out of sweet potatoes and chickpeas?  Not me!  This recipe was originally intended to be Black Bean and Yam Tacos from the Skinny Bitch cookbook that I love.  It turned out that I was out of black beans, so I subbed chickpeas, and it worked! These tacos were super simple to make and full of yummy vegetables.

The first step was to saute a sweet potato until soft.


Then, I added a diced green bell pepper, and spices: garlic, cumin, coriander, chile powder, and oregano and sauteed some more. 


Next up I added a diced tomato and a can of rinsed chickpeas and sauteed until warmed through.


Finally, I sliced up an avocado and spooned the mixture into a whole wheat tortilla. These tacos surpassed my expectations.  They had great flavor, a fajita-like texture, and were full of nutrients.  I bet they would be good with other vegetables as well.  Corn and squash are two easy additions that come to mind.  Have you ever made meatless tacos? 


Tuesday, September 25, 2012

Pumpkin Cornbread

As you probably noticed last year, I have jumped on the pumpkin band wagon.  My latest venture into the world of baking with pumpkin was some pumpkin cornbread to go with my vegan/vegetarian chili. I found this recipe on Two Peas And Their Pod.  It was the first time I've been disappointed with one of their recipes. I first got concerned when I saw how long the ingredient list was: flour, baking powder, salt, cinnamon, nutmeg, brown sugar, cornmeal, eggs, pumpkin, olive oil, and molasses. 11 ingredients!  


The first step was to mix the dry ingredients together--all 7 of them!


Then I mixed the remaining 4 wet ingredients together and combined them with the dry ingredients, mixing just until moistened.


Next I scooped the batter into greased muffin tins.  The recipe made 12 muffins and some mini muffins. 


After coming out of the oven they looked and smelled great. 


And, as you can see here, they had great texture.  You must be asking yourself at this point why this recipe was a failure. After all, I just said they looked great, smelled great, and had great texture.  The problem was that the taste was off.  Because olive oil was the only fat used in this recipe, the muffins tasted like, well, olive oil. 


I think if I were to try pumpkin cornbread again I would do one of three things: replace the olive oil in this recipe with canola or vegetable oil; find a new recipe that does not use olive oil at all; or use a Jiffy mix and replace some of the wet ingredients with pumpkin.  Have you had any luck with pumpkin cornbread?