Tuesday, March 27, 2012

Overnight Oatmeal


I have a new obsession: overnight oatmeal.  I saw this idea on a variety of different food blogs, but one stood out to me.  Kath, of KathEats (http://www.katheats.com/favorite-foods/overnightoats) is even more obsessed with this idea than I am.  Overnight oatmeal is great because it can be prepared ahead, which means an extra 10 minutes of sleep in the morning.  It also allows for a ton of different flavor possibilities.  So far I have made peanut butter banana oats, pumpkin pie oats, and pecan pear oats.  They were all delicious, each in their own way.

Even though it is extremely easy to make this dish, I took step-by-step pictures to teach you. This recipe is for banana peanut butter oats.  The first step is to mash a banana together with peanut butter using a fork.


Then add the rest of the ingredients: milk, yogurt, oatmeal of any variety, and cinnamon.  Recipes vary in the amount of milk they call for.  I have used any where from 1/3 cups of milk plus 1/2 cup yogurt to 1 1/3 cups of milk without yogurt with between 1/3 and 1/2 cup oats, and it turned out every time. The yogurt gives the oatmeal a creamier consistency.


Mix the ingredients together, seal your container or cover it, and put it in the refrigerator overnight.   In this picture, I have made my oatmeal in a reusable plastic container.  I find that this is the most convenient way to take my oats to work in the morning.  Plus, there are fewer dishes to do!


In the morning, take out the oatmeal, give it one more stir, and enjoy!  At first it might seem weird to eat oatmeal cold or at room temperature.  I find it kind of refreshing while sitting in my hot office at work.  If it really bothers you, though, you could always microwave the oats.

Here is a picture of my pumpkin pie oatmeal. It contains banana, pumpkin puree, yogurt, milk, oats, nutmeg, cloves, and cinnamon and is topped with chopped pecans.

Saturday, March 24, 2012

Banana Pumpkin Chocolate Chip Muffins


By now, you may be able to guess my favorite ingredients to put in baked goods:
  • Banana
  • Pumpkin
  • Chocolate chips
A couple of weekends ago I combined them all into one glorious muffin. I was going out of town for the weekend with a couple of friends, and knew we would get hungry on the drive to the mountains.  These muffins were perfect for the road.

I modified the recipe from another blog's recipe for pumpkin banana chocolate chip bread.  You can find the original here: http://www.runningtothekitchen.com/2011/09/pumpkin-banana-chocolate-chip-bread/.

Muffins are pretty easy to make.  First, mix the ingredients together. In this case, the ingredients were whole wheat flour, unbleached all purpose flour, wheat germ, oatmeal, brown sugar, baking powder, baking soda, salt, vanilla, cinnamon, bananas, pumpkin puree, egg, applesauce, milk, and chocolate chips. As far as muffins go, I think this is a pretty healthy version.


This is the type of mess that normally occurs when I am cooking or baking.


Then, put them in a greased muffin tin and bake in the oven at 350 degrees for about 20 minutes. When a toothpick comes out clean, they are done!


As you can see, I made both regular-sized muffins and mini muffins.  Muffins and cupcakes freeze surprisingly well.  The leftovers from our trip are in my freezer right now.

Thursday, March 22, 2012

Thai stir fry

I recently discovered Food Gawker (www.foodgawker.com).  If you haven't checked this out yet, you must.  It is a compilation of recipes from blogs around the web.  There are many creative ideas on here of dishes that I would never think to make on my own. 


A recipe on this site served as my inspiration for a Thai stir fry made primarily of sweet potatoes, lentils, and cabbage. Here's the link to my inspiration: http://pinchofyum.com/creamy-thai-sweet-potatoes-and-lentil.

The first step was to cook the lentils and sweet potatoes in vegetable broth.  I started the vegetable broth and lentils on the stove while I cut up the sweet potato.


Once the sweet potato was peeled and cut into approximately one inch squares, I added it to the vegetable broth and lentils.


After about half an hour, the lentils and sweet potatoes were soft.  It is easy to check when potatoes of any kind are done cooking by sticking them with a fork.  If the fork goes in easily, they are done.  While the lentils and sweet potatoes were cooking, I prepared the next round of ingredients for the pot: fresh ginger and canned tomatoes.


Here's what the mixture looked like after adding the tomatoes and ginger:


 While that cooked, I prepared for the other part of the preparation process.  This included stir frying cabbage with my favorite three ingredients (can you guess these yet?): olive oil, garlic, and onion, plus a jalepeno. First I cut up the cabbage into small strips.  It just so happened that this week cabbage was on sale for 33 cents per pound.  That's even cheaper than bananas! It's too bad cabbage isn't a very nutrient-dense vegetable.  The sweet potatoes and lentils make up for it in this dish though. 


Finally, it is time to combine all of the ingredients. After the cabbage was cooked (about ten minutes), simply mix together the cabbage mixture with the sweet potatoes and lentils.  All that's left to do is pour in some coconut milk for creaminess.


This colorful dish is vegan, packed with nutrients, and made great leftovers for lunch.  I think I am going to make this again with the coconut milk leftover from this recipe.

Sunday, March 11, 2012

Butternut squash ravioli

The recipe for this butternut squash ravioli came from Kim Barnouin's vegan cookbook: Skinny Bitch: Ultimate Everyday Cookbook.  Check out some of her other recipes here. I should preface this entry with a few things:
  1. I had never had butternut squash ravioli before making this recipe.
  2. I had never made ravioli before making this recipe.
  3. I modified the recipe in order to use ingredients I already had, which eliminated its vegan-ness.
For those reasons, I took pictures of the process (almost) every step of the way.   The first step was to make dough for the ravioli.  This was a simple dough made of flour, salt, and water.  It look a LOT of kneading for the dough to become smooth.  I wasn't sure if this was because I got the flour-water ratio wrong, or not.  After far too long, the dough finally stayed together:


After letting the dough raise for twenty minutes, the next step was to roll the dough out very thin.  The goal was 1/16th inch thickness. Using my French rolling pin, I was able to achieve this. Do you know the difference between a French rolling pin and a traditional rolling pin? Comment below if you do!


After the dough was sufficiently thin, I cut it into 3 inch squares.   The picture below is of half of the dough.  I had to do two batches since one half of the dough took up my entire counter space...


 Next up is the filling.  The main in ingredient was (surprise, surprise) butternut squash.  I used frozen squash that came pre-cut.  This picture shows a mixture of two brands--one organic, and one conventional.  Can you tell the difference?


I couldn't.  They both appeared to be about the same color.  One variety was just cut into slightly larger chunks.  I let the squash thaw on the counter and then combined it with butter using a fork.  The recipe suggests using a food processor, and I would follow its advice. 


Once the squash and butter were combined, I added the remaining ingredients for the filling: Parmesan cheese, salt, pepper, and bread crumbs. 


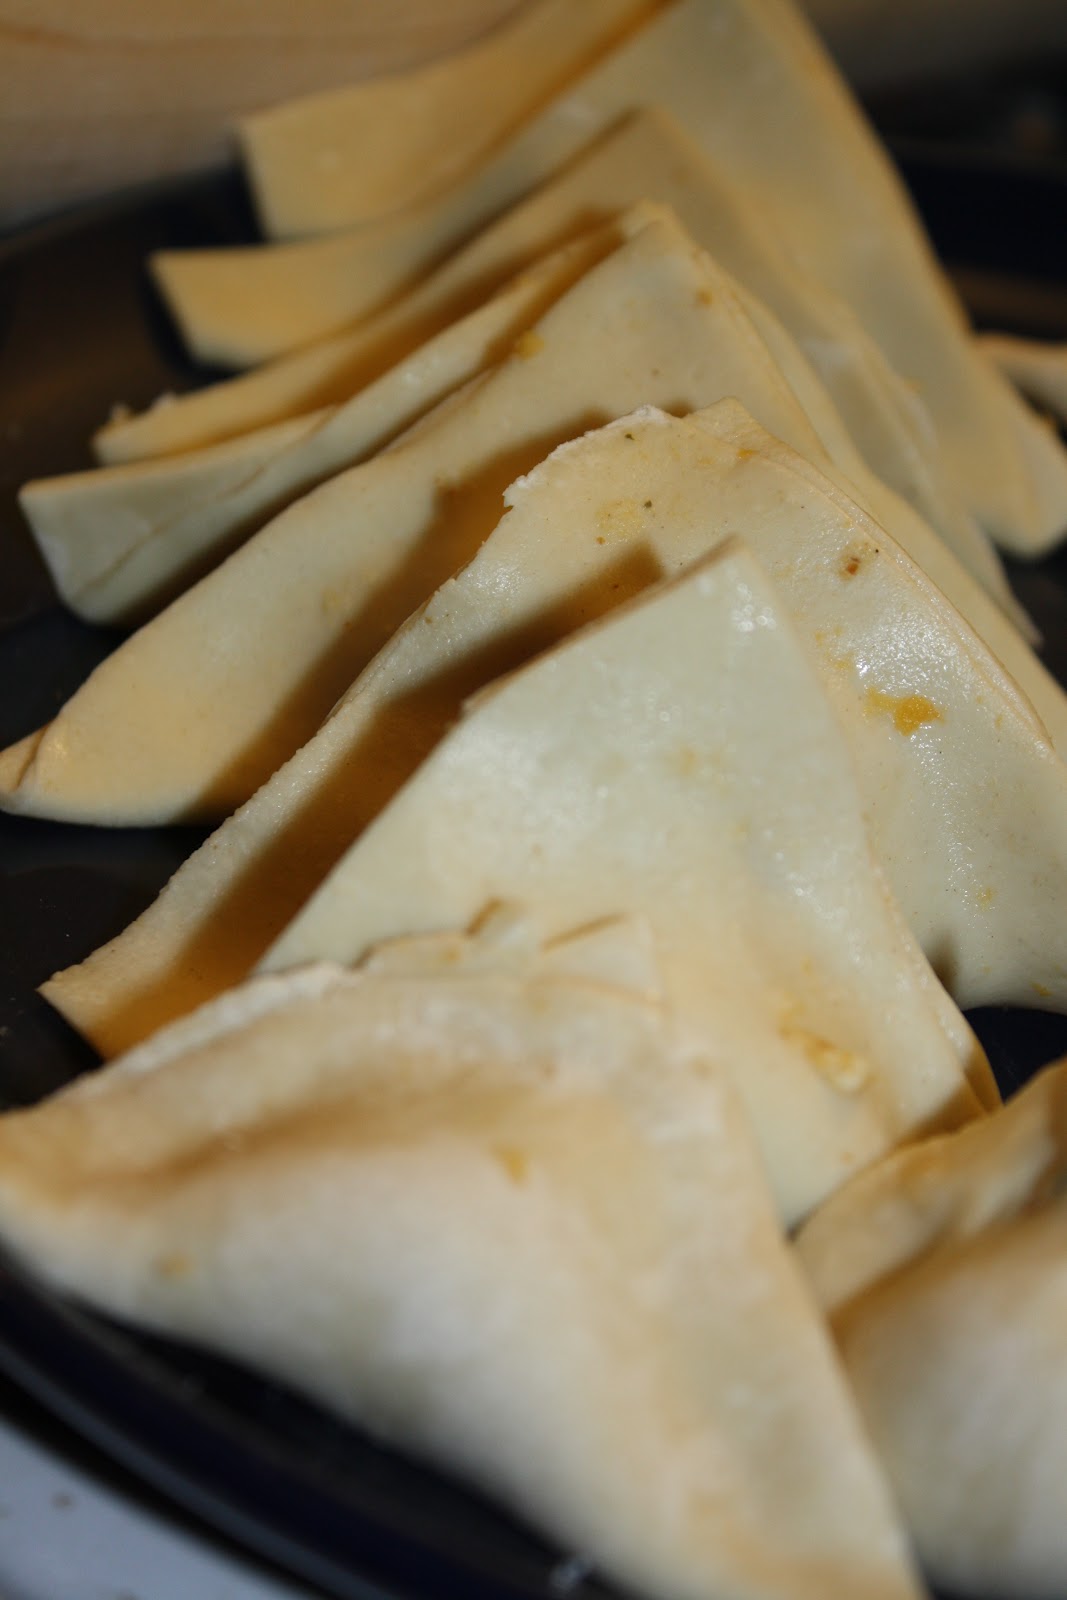
Finally it was time to put everything together. On each piece of dough, I piled about a tablespoon of the filling. Then, using a trick my friend taught me while making dumplings, I dipped my finger in water and ran it around the edges of the dough.  (That's why the edges are shiny.) Next, I folded the raviolis into a variety of shapes, using the wet edges to seal the dough.


The traditional shape suggested by the recipe was a triangle.  To make a triangle, you simply fold the square wrapper in half diagonally.


It is also possible to get a little more creative, though, and come up with more interesting shapes.  Here are a few that I learned from making dumplings.  It is possible to make any shape that you wish, as long as the edges are sealed.  This prevents the filling from leaking out in the cooking process.


Speaking of the cooking process....the ravioli cook in a pot of boiling water for approximately 5 minutes.  Because there is no meat in these ravioli, there is no need to worry about under cooking the filling.  Once the dough is done, so is the filling. 


While the ravioli are cooking is a perfect time to prepare the sauce.  The recipe suggests a sage sauce.  I had never cooked with fresh sage before, but bought some from the grocery store:


The sauce was very easy to make.  I simply melted butter in a skillet. Note, this is only half of the recommended amount of butter.  I couldn't bring myself to use an entire stick of butter for sauce.


And then added chopped sage.


Once the sauce was nicely combined, I simply poured it over the ravioli.  Voila! You may have been able to guess by the amount of butter (or margarine if you are creating this recipe as a vegan) and cheese (or vegan cheese) in this dish that it is very rich.  Butternut squash itself has a creamy consistency.  Once you add butter and cheese, the combination melts in your mouth. These ravioli, while a little time consuming to make, were well worth it.


When I ate the ravioli as leftovers the next night, I opted for a tomato sauce in lieu of the rich sage sauce.  This worked equally well with the butternut squash filling. 

Sunday, March 4, 2012

Fries!

Who doesn't love fries? Luckily, you can create delicious fries at home that are way better for you than those ordered at fast food restaurants. Plus, it's really simple.  All you have to do is cut up a potato or sweet potato (my favorite--extra flavor AND nutrients) into the shape of your favorite fry.  I made traditional sticks this time, but you can also make steak fries, round fries, wedges, etc.  I'm sure there's a way to make waffle fries too, but I have no idea what that is.  Let me know if you know how to do it! After the fries are cut, toss them in olive oil (healthier than vegetable or corn oil) and whatever spices you like.  The plain potato fries here were made with salt pepper and parsley, while the sweet potato fries were made with cayenne and salt. Here are the fries before baking:


And after:


What kind of fries do you prefer?  Potato or sweet potato?

Fig turnovers

My family's beach house has a giant fig bush out front.  Every summer there is a massive fig harvest, and no one knows exactly what to do with the figs--other than make fig jam.  One (extended) family can only eat so much fig jam... In preparation for this year's trip, I decided to try to make fig turnovers.  (Well, that and my mom gave me some leftover figs she had from baking.) Here are the figs:


The first step was to create the filling.  To do this I used my magic bullet to combine cream cheese (leftover from making cheesecake strawberries), raw cane sugar, and the figs. The filling was still chunky when I stopped blending, but if you wanted, you could blend it until creamy.


Then I copped out.  Instead of making my own dough, I used cresent rolls that come in a tube.   I rolled out the dough into the pre-cut triangles.  After placing about a tablespoon of filling on each triangle, I rolled up the cresents into their traditional shape and placed them in the oven.  I baked them at 350 degrees for 7-10 minutes. Here they are going into the oven:


And after they came out:


The turnovers browned nicely (thanks to the pre-made dough, not me) and had a great texture (again, no thanks to me). The filling complemented the rolls well, but was nothing amazing.  I won't be recommending this recipe as a way to use figs at the beach this summer. The filling, however, made a great spread on top of bagels for breakfast for the next week. 

Guess what vegetable?


Is it broccoli?


Could be...


Here's what the entire vegetable looks like.  Still think it's broccoli? Nope!  It's broccolini. I had never heard about this vegetable before reading Skinny Bitch.  It turns out that broccolini is a hybrid between broccoli and Chinese kale.  It can be found in neighborhood grocery stores, but it a little pricy.  This bunch of broccolini, which was approximately one pound, cost $2.99.

This vegetable is very versatile.  To me, it tastes like a combination of broccoli and asparagus.  It has florets like broccoli and long skinny stalks like asparagus. It can simply be boiled or steamed, like either broccoli or asparagus.  This was my first time cooking broccolini, so I wanted to follow a recipe step-by-step.  I choose "sauteed broccolini with garlic-infused soy sauce" from the Skinny Bitch book and was very impressed.  First, I boiled the vegetable for a few minutes. 


Meanwhile, in a pan I prepare the Asian-inspired sauce.  You can guess from the name of the recipe the main ingredients... Here is the final product.  This recipe was simple and amazing.  It was actually so good that I ate an entire serving over the stove straight from the pan before transferring it to a plate to devour the rest (without sharing).


Update on cheesecake strawberries


Last weekend I went to Philadelphia to visit a friend and watch her a capella concert.  It turns out that it was also the weekend of her roommate's birthday.  My friend had seen my cheesecake strawberries on my blog, and asked if I would make them for her roommate.  Of course I said yes, and had a blast making them with her boyfriend and roommate's brother.  We made an improvement this time.  Instead of dipping the stuffed chocolates in graham crackers and mini chocolate chips, we dipped them in chocolate, to create chocolate covered strawberries filled with cheesecake.  Needless to say, they were devoured before the birthday cake.  I didn't get a great picture, but here they are chilling in the fridge before the party.

Breakfast take two


On the average work day I have instant oatmeal for breakfast at my desk.  The first time I got tired of this routine, I bought a new flavor of oatmeal.  After trying the majority of flavors (peaches n cream just did not seem appetizing in the least), I switched it up and bought instant cream of wheat instead.  One tiny packet of cream of wheat contains 50% of the daily recommended amount of iron!  While I thought that was fabulous, I was not a huge fan of the product.  After some discussion with my coworkers, I realized that cream of wheat turns out to be much more enjoyable after I added more water than the packet recommended and stirred it for about three minutes after it came out of the microwave.  Much better.

Recently, I've been trying to get even more creative with my routine breakfasts. Not that buying a new flavor of instant breakfast cereal is exactly creative...but you get the idea. My first experimental breakfast was with cream of wheat.  First of all, I used milk instead of water.  This results in a creamier consistency, plus extra protein! I also added fruit--blueberries and bananas--as well as some cinnamon. It doesn't look super amazing in this photo (I took it with my cell phone at my desk), but believe me, it tasted much better than plain cream of wheat.


 My second attempt at creative breakfast cereal was a little more involved.  I bought old fashioned oats to cook on the weekends.  I figured that creating my own oatmeal flavors would be fun, plus healthier since the instant packets contain a lot of sugar.   I call this creation pecan pear oatmeal. In this version, I cooked the oats as directed on the stove, and stirred in cinnamon, a little raw cane sugar, half of a diced pear, and a handful of pecans while the oats were cooking. The oatmeal turned out to be the best I have ever eaten.  The flavor of the pear permeates through the oatmeal, creating a rich flavor.  It is almost like eating a poached pear for breakfast. Yum.